Thursday 26 July 2012

Making a Fosshape hat..

The last week or so have been madly busy and at last we have glorious sunshine and heat, just in time for the Olympics. As if I haven't enough to do what with some custom hat orders, plus making others for the fun of it, I thought I would take on a new project....

I love to experiment with new materials and I'd heard about a fabric called Fosshape, used primarily for costume making but also suitable for millinery. This is the description of it taken from their website, rather than me waffle on

'Fosshape is a unique patented non woven fabric. The breathable fabric can be cut to shape with scissors and sewn to itself or other fabrics. So what makes it unique?.......... Fosshape can be heated with a domestic steamer [or hot air gun] to form any shape. When heated the material will shrink and become stiff. Its breathable properties and very light weight make it ideal for stiffening costumes and making large headgear and costume props.'

This sounded so intriguing so I contacted the company who make it Wonderflexworld and they kindly sent me a small sample through their UK distributor Flints

and this is where the fun begins..

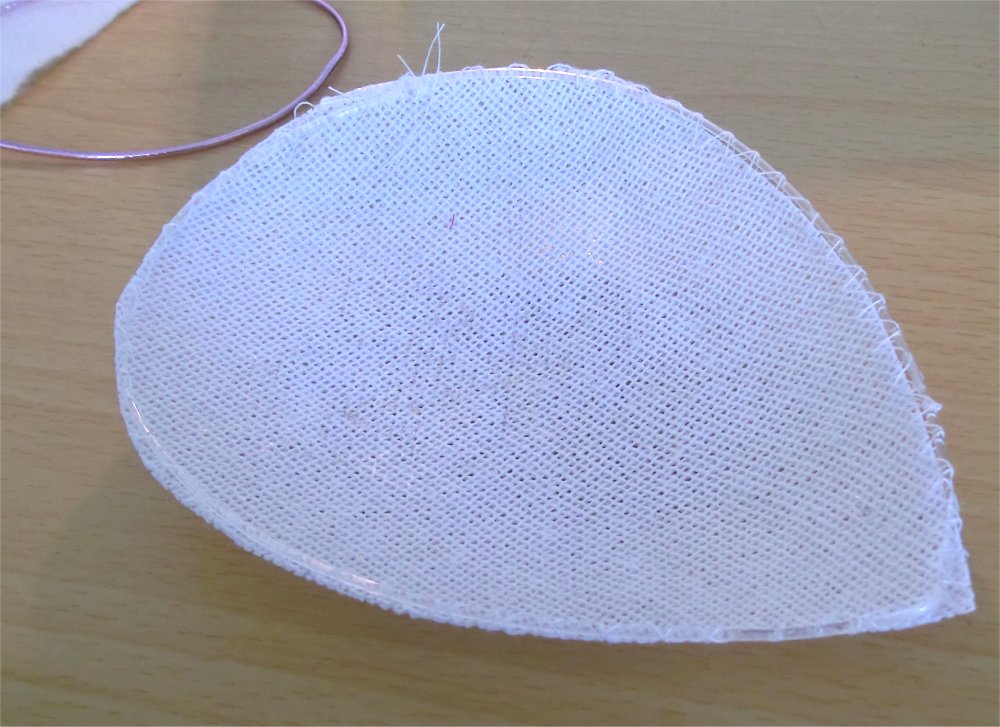
The sample was about 10 inches by 5 inches, and rather than cut it up and sew it, I thought it best just to try a simple shape at first. Decision was made to make a small half hat, and I cut the fabric into the shape I wanted ( I know...it looks a bit like an eye mask!)

You have to apply heat to the fabric to stiffen it, and HOT heat via a hot air gun or iron or steamer. I thought I would use an old polystyrene head for my first attempt and use the iron. Just in case using the hot air gun ending up with a mess or burns.

I covered the head in a layer of wadding and then 3 layers of tin foil to protect it.

I put the iron on high and steam and then just ironed the fabric in situ. You can stretch and manipulate whilst heating, but as this was a small item and I only needed a symmetrical shape, I didn't bother. I just kept going over with the iron until I felt it 'was done' :) It does shrink in the process, but I found it was minimal and I had accounted for it when cutting my shape out.

This is it once cool and hardened..

and this is it on my new poly head that I've just painted! She is version number 2, and not finished yet, but I think I'm getting better at it!
My conclusions on Fosshape are, that it is much quicker to use than buckram, no waiting around for it to dry, and you also achieve quite a smooth surface, so I won't need to add an interlining. I am not sure what weight fabric I was given, but am inclined to think it was the lighter weight and I feel I will have to wire the edges for extra rigidity, but overall I'm very pleased with it. I felt that if I had a larger piece I could manipulate it quite well and get some good shapes from it. It costs quite a bit more than buckram, but for complicated items it would save a lot of time and therefore money.

Once I have played with this hat base a bit more....I will let you know how it goes... and pics will follow

cheers for now, have fun and enjoy the sun xx

Tuesday 24 July 2012

Making a buckram fascinator - Part 2

Well, I started adding decoration to my hat and then suddenly realised that I hadn't photographed it as I went!

My apologies that the veiling and leaves have been sewn on with any tutorial, but this was the easiest bit. I cut some purple, pink and lilac veiling and fussed about with it until I was happy with the look. Its best to keep trying it on your head in front of a mirror, to get it just right. I then added a selection of shiney acrylic leaves in toning and contrasting colours. All of this was stitched through the top fabric, I didn't need to go right through the hat.

Next I cut a small section of blue/grey lining on the bias and tacked this to the underside of the hat.

The next stage is to tidy the edges of the lining etc by covering with tape. Normally i would use grosgrain, but I didn't have any in a suitable colour, so I have used lilac bias binding. I ironed this into a curve first, so that it would fit nicely. Just pull the bias around at an angle whilst running the iron over it.

I've realised that my ironing board cover looks very tatty, and its covered in fabric paint!

The next stage was to stitch the binding in place using very small running stitches along both sides and folding the ends together neatly. I also added my own label

That's it done and now ready for sale! I hope you enjoy reading, and I always look forward to any comments. Best wishes to you all

Thursday 19 July 2012

Making a buckram fascinator - part 1

I hope this little tutorial will be of interest, as I am not very good as chatting about anything other than hats, vintage or the state of the British weather :)

This is a little buckram hat that I am making and these are the first stages. I cut 2 oblongs of white buckram fabric roughly 8 x 10 inches. Buckram is a stiffened cotton open weave fabric, and once wet it can be moulded and reshaped. I ran the pieces under the tap until they became soft enough to manipulate, then I stretched them over a polystyrene head. You don't need a hat block for this, as the hat will be one size, and just needs to have a curve to it. I stretched them on pulling and pinning at the same time to keep the fabric in place without folds. I always use 2 layers as I find it gives more body and a better finish. The starch in the fabric can make your hands sticky, and can cause the fabric to stick to your mould, so it is best to cover the mould /head with some cling film or tin foil first.

This was then left overnight to dry, it must be really dry before you remove it from the mould. Before I removed it I used a laundry pen to mark out a shape for my hat, and I decided on a small tear drop. I removed the buckram from the head and cut around my shape. The next stage was adding some wire to the edge to keep the hat firm and give a good shape. I decided to use plastic brim wire, as I don't want the hat to be bent or deformed. I stitched this in place using a zig zag stitch on the sewing machine.

I like to add hat elastic at this stage, before I cover the base, and I had some nice shiny pink elastic, so I'm using this. I poked 2 holes either side of the base using an awl or you can use a large needle. I then thread the elastic through, make a knot and then stitch using the sewing machine to make doubly sure it won't come adrift!

Normally you would use a domette or similar fabric for covering the base, this achieves a nice smooth finish to your covering. I used a similar interlining and cut this to the approximate shape of the tear drop and fold over and roughly stitched in place. Then I sew, using a machine zig zag some bias binding around the inside of the base to give me something to sew the final cover and lining to.

Then I cut my fabric to cover the base, I have used a purple linen mix fabric. Make sure you add lots of small pleats as you go around, this gives a nice neat outer edge. I stitch the outer fabric to the bias tape that I put in place previously.

Thats all for now, but I will add part 2, which is the trimming and lining etc. I hope you enjoy my tutorials