Tuesday, 17 November 2015

Homemade saucer block update and making my own blocking springs

Further to my last post, I am really pleased with how the block turned out.
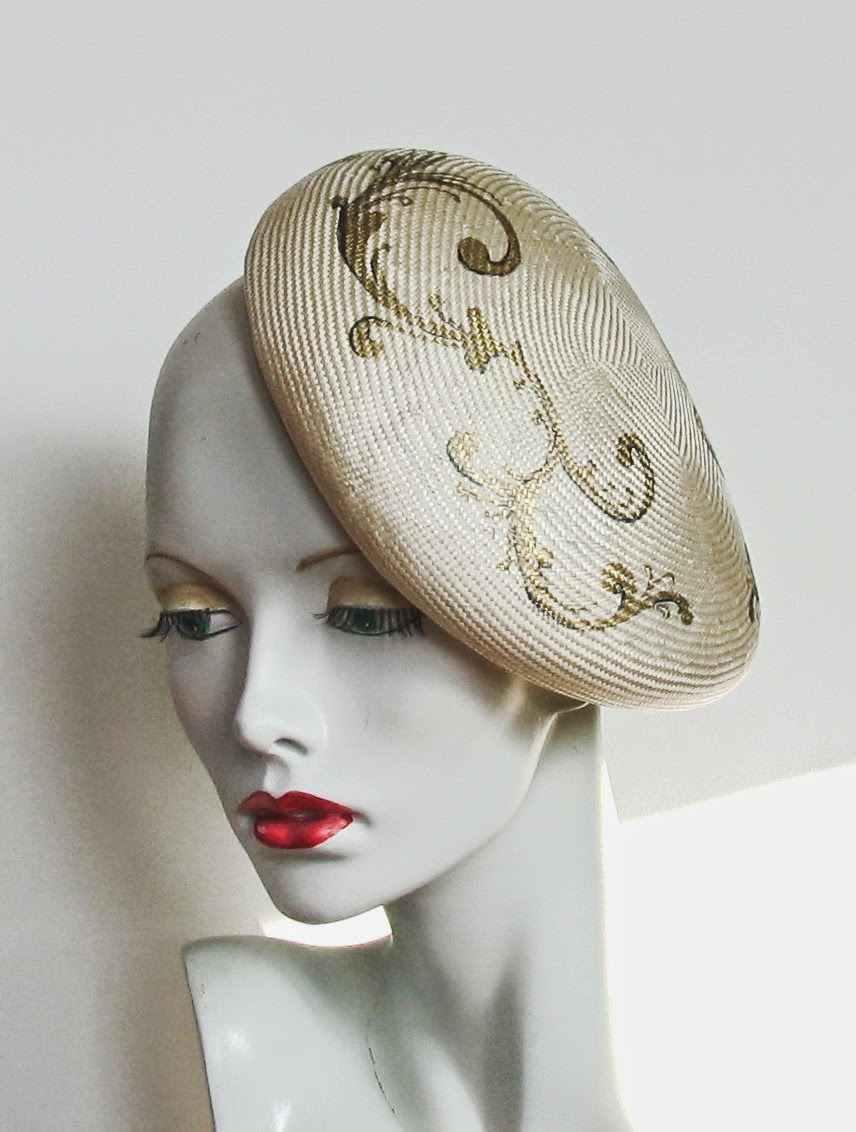
Having blocked some red sinamay on it, I stitched brim reed and bias sinamay to the edge, added a red ribbon covered head band...and then went festive!


I recently posted on facebook that I make my own blocking springs (saves all that pinning and string!), this is how they are used


and this is what I use to make them, red hollow polythene belting, sometimes called red quick go, or hollow poly tubing. I use 8mm diameter, and use these tiny metal connectors that push into either end. Bear in mind once in, they can't be removed. If you intend trying it out, cut your tubing slightly smaller than you need as it will stretch, and you do want a good tight fit.


Monday, 16 November 2015

Necessity is the mother of invention - making a hat block

The last year or so has held a lot of tears and heartache for myself and my family, hence no posts on my blog....but hat making keeps me going, and I am just sharing my experiments on making a hat block.

My latest idea for a fascinator required a small saucer block, which of course I didn't have! So after a bit of head scratching and rummaging through the cupboards - here's what I came up with.


I used a small fascinator crown block as the basis of my block. But I could have used a small bowl, it didn't need to be wood, it could have been anything of the correct shape.


Next I marked out a thin plastic chopping mat with the shape required. The inner circle is slightly smaller than the diameter of my basic block and the outer circle is the overall diameter that I wished the fascinator to be. I then cut this out, cutting through from the outer to inner circle so that I could overlap it and create a concave shape.


I then taped it to my block and covered the whole shape in clingfilm.


After the event, I realised I should have just covered just the block in clingfilm and not the plastic collar, it would have been easier for removing, but hey ho...we live and learn!

Then I applied 3 layers of damp buckram, carefully pulled to shape and pinned the center. I use wig pins as these do not rust , and around the edge I used plastic paper clips (again no rust marks).


Once totally dry I removed it from the block (leaving the plastic collar as extra stiffening) and trimmed. I can always put it back on the block to pin the center but obviously I cannot pin the edges, so it will have to be paper clips or similar. As the edge will be trimmed I am not too worried about marks, and I will press with an iron to minimise these.

I have to say, that if I intended to use this a lot I would probably stiffen more, either with layers of varnish or something similar.

And now it has a test hat on...3 layers of stiffened sinamay!


I hope you find this interesting and helpful. Yes I could have bought a block that would last me many years, but this was fun to make and gave me a great sense of satisfaction :)

I will let you know how it all turns out!


Friday, 4 July 2014

Handpainting a straw hat and using Shellac

A lot of interest was generated on Facebook as to how I stiffened and painted this parasisal straw hat.


So I thought I would do a few posts on how it came about. I do love painting on hats, and although I have painted fabric and felt, fine straw gives a much better 'canvas' being much smoother, and as I stiffen the hat first, the paint doesn't seep so much.
So here goes how I do it;
I decided to do a cloche, reasons being
  1. that you can see the painted design easily.
  2. who doesn't like a cloche!
  3. It gives me a large area to be creative.

The block is an all in one, size 22.5 inches crown, which I have covered in cling film. Then I steam and stretch the straw capeline. My pifco steamer gets good use here :) This block has no string grooves, so slip knot string is used for the crown and it has to be pinned underneath.


Whilst waiting for this to dry, I have been working on some design ideas. The 2 that appeal most are a Clarice Cliff style tree and house design, or alternatively some deco style leaves. I have worked on the design being roughly 4 inches high and 11 inches long, so that I can replicate on both sides.
It is too difficult to do straight lines on a curved hat, so it needs to be a flowing design that will be easy enough freehand. I am not sure which to go with yet!


I like to use Shellac for stiffening, its great for straw or felt. Shellac is also called French Polish and is extensively used for varnishing furniture. It comes in lots of colours, but as I want this to stay the original colour, I am using White or clear polish (it still has a slight brown tint but not enough to affect the colour of the hat). You will need a mask and a window open as the smell is quite strong, especially as it is diluted with Methylated spirits. Gloves are a good idea, otherwise your hands can get very sticky.
I would like to use clear Meths, but this is not available to the public, it is all dyed purple to stop people drinking it. But again, I haven't found the colour affects things too much. Follow safety rules and keep away from flame etc. Shellac dries very fast and very hard and needs practising with.

I dilute the shellac approximately 50/40 with meths, but it depends a lot on the straw and how hard I want the finish. I use a wide brush for speed and an even finish. On straw it will leave a lovely sheen, so if you want a matt finish it is better to stick to traditional straw stiffener.


I'm off to see if the straw is dry and I will start stiffening, then onto the fun part...painting!! I hope to update tomorrow with the next installment.

Best wishes, Sara x


Day2...well not really, more like 6 hours later.
but progress..
Hat has had light coat of shellac
and paints are out...


I have lightly pencilled in the design, although I doubt you can see it in the picture, and painting has started, I am using acrylics, and trying to stay fairly true to the Clarice cliff style colours, which means lots of mixing...


Once the main colours and design are painted in I then added an outline with a waterproof black artists pen,
don't use sharpies I discovered at my cost they will run when adding the last coat of shellac!!!
I then put my string back to keep the shape and heat sealed with a hairdryer.


Hat design finished, but the hat is not! I have added another light coat of shellac and you can probably see where I used a sharpie pen for the black line between the orange and blue, it ran, but all will be made good. Tomorrow I will add a brim wire, brim edge and sweatband. I look forward to the finished hat


Hat now fiished, although I cut off the bottom which had run, and added a petersham edge


Sunday, 15 September 2013

A rainy autumn day has led me to stay in my workroom and sew, which has been such a treat!
I spent a happy hour yesterday at 'Rose Tinted Rags' a recycled textiles and arts project in Hereford. They have an amazing amount of vintage fabrics, haberdashery, sewing machines plus lots more and  I came home with a bag full of interesting finds.
Among them was some very cheap new cotton shirting with a pale grey stripe. I thought this would be ideal to try out my vintage Butterick maternity smock.
As with most vintage patterns from that era, the instructions were brief and the pattern unprinted! The pattern is for sale in my Etsy shop, so to avoid making pin holes I used weights to hold the pattern down and a fabric pen to make the dots etc. I decided to make the sleeveless version and the instructions called for me to make a bias armhole facing (no pattern piece supplied) which I did, again using my pen to mark out...but in all honesty I would probably use bias tape if I made the top again.


The shawl collar was the type I hate sewing with a facing that I struggled to make neat, and I wasn't happy with the construction method for the yoke. But perseverance paid off  and this was the finished top....


Excuse the black bin liner over the mannequin, but it is one of my vintage mannequins and in the smaller size that I needed....even though most of its covering has disintegrated!! Recovering will be another job for another day.
Happily my daughter loved the top, and has just taken it home with her.
Just a reminder, this was the pattern used..


Next on my list 'to do' is making some hats....as my millinery has fallen by the wayside lately, and withdrawal pangs are setting in. Ideas abound in the old grey cells including a clothe with soutache decoration...so maybe soon........ x x

Wednesday, 11 September 2013

Apologies for not keeping up to date with my blog. There has been so much happening what with family weddings, house remodelling, and helping my daughter with her first house move, and now a new baby on the way for her and her family...phew.. Not many hats made...but lots of ideas in the pipeline! I have been sorting through all my vintage patterns for nice baby and maternity ones, and have just done an interview all about them for the Monthly Stitch. Take a look if you like patterns and love sewing

www.themonthlystitch.wordpress.com


Friday, 8 February 2013

Half hat progress

Well, further to my last post, the half hat has changed tack entirely. I was never happy with the size of the pattern or the sewn hat. Having to add darts gave the hat very full sides and almost a winged look.

I decided to cut the pattern much smaller and make the hat from some blocked felt. It was much easier to make and achieved a more pleasing shape. I also cut a strap for the back and stitched this in place. The edges of the hat have had gold and black trim, and a few black beads added. The hat has been stiffened with traditional shellac. I am still dithering about a small veil, what do you think?

I am busy gearing up for my stall at a Vintage clothing fair in Hereford on March 16th. So it has been a lot of fun make fascimiles of 1940s and 50s hats. I saw the one below in a knitting pattern ( you can see the original picture), and decided to have a go. Again it is blocked wool, but I must admit the edges aren't rolled as well as I would of liked...still, its been a learning curve!

Monday, 21 January 2013

Making a half hat pattern

For me the last few weeks have been somewhat of a disaster. My eldest spent the entire Christmas week in hospital, and myself and the rest of the family stayed sober to travel back and forth twice a day. But all is well with him now, and back to full health.

Aside from ill health, the weather has meant a slow down to most things. Freezing cold days (-3c at the moment) and high humidity mean my day job is at a stand still. The builders who are constructing my new kitchen extension are also at a stand still.......so getting back to hats seemed my best option. Particularly as I have a stand at a Vintage fair in just a few weeks!

I found this picture via the web, and although no pattern was available I thought I would try and make the half hat pictured on the right hand side

I then measured out a pattern on grid paper, I guessed from the picture that the hat had to reach at least 7 inches across the crown.

I cut the pattern out in stiff iron on buckram and stretch velour. These were ironed together and then the darts sewn in each side. I then wired the entire edge. This is it so far, and although it sits on a small mannequin, I think I may have to make it slightly smaller next time.

I will continue with this one, and I am planning to decorate the edge with beads and sequins. I will post again when it is finished.

Friday, 21 December 2012

Christmas sock animals

May I take this opportunity to wish everyone a very merry Christmas and a great 2013. I have been sadly lacking in keeping up with my blog, but the day job overtook most things. Which means I am last minute present making, wrapping and generally worrying over. I always make presents for the family and I also try to add some decoration or a funky twist. Ladies were easy this year, but the men always cause me more headaches. In the end I opted to make personalised coasters and these were made and boxed some weeks ago, but I did want something cute to add to the outside. With the ladies, I made festive fabric hanging hearts, but I couldn't come up with an idea for the boys. I could only think of socks, then 'sock monkey' came to mind......but most sock monkeys and animals are cut and sewn, this had to be much easier so that when they took off the elastic bands and sticky eyes...there would be a perfectly formed pair of new socks! Here are my sock animals (I am not sure what breed ...but they look cute enough!)
They are so easy to make just one sock stuffed into the first sock and the bottoms rolled up inside, and a few elastic bands to form the ears and head. A ribbon for decoration and either goggly eyes stuck on using double sided pads or just use some sticking circles or shapes...voila!... and I think they suit the presents better than a bow! I hope you like, and I hope to post more hat related topics come the new year. Happy sewing (or non sewing in the case of the sock animals!) xxx

Thursday, 26 July 2012

Making a Fosshape hat..

The last week or so have been madly busy and at last we have glorious sunshine and heat, just in time for the Olympics. As if I haven't enough to do what with some custom hat orders, plus making others for the fun of it, I thought I would take on a new project....

I love to experiment with new materials and I'd heard about a fabric called Fosshape, used primarily for costume making but also suitable for millinery. This is the description of it taken from their website, rather than me waffle on

'Fosshape is a unique patented non woven fabric. The breathable fabric can be cut to shape with scissors and sewn to itself or other fabrics. So what makes it unique?.......... Fosshape can be heated with a domestic steamer [or hot air gun] to form any shape. When heated the material will shrink and become stiff. Its breathable properties and very light weight make it ideal for stiffening costumes and making large headgear and costume props.'

This sounded so intriguing so I contacted the company who make it Wonderflexworld and they kindly sent me a small sample through their UK distributor Flints

and this is where the fun begins..

The sample was about 10 inches by 5 inches, and rather than cut it up and sew it, I thought it best just to try a simple shape at first. Decision was made to make a small half hat, and I cut the fabric into the shape I wanted ( I know...it looks a bit like an eye mask!)

You have to apply heat to the fabric to stiffen it, and HOT heat via a hot air gun or iron or steamer. I thought I would use an old polystyrene head for my first attempt and use the iron. Just in case using the hot air gun ending up with a mess or burns.

I covered the head in a layer of wadding and then 3 layers of tin foil to protect it.

I put the iron on high and steam and then just ironed the fabric in situ. You can stretch and manipulate whilst heating, but as this was a small item and I only needed a symmetrical shape, I didn't bother. I just kept going over with the iron until I felt it 'was done' :) It does shrink in the process, but I found it was minimal and I had accounted for it when cutting my shape out.

This is it once cool and hardened..

and this is it on my new poly head that I've just painted! She is version number 2, and not finished yet, but I think I'm getting better at it!
My conclusions on Fosshape are, that it is much quicker to use than buckram, no waiting around for it to dry, and you also achieve quite a smooth surface, so I won't need to add an interlining. I am not sure what weight fabric I was given, but am inclined to think it was the lighter weight and I feel I will have to wire the edges for extra rigidity, but overall I'm very pleased with it. I felt that if I had a larger piece I could manipulate it quite well and get some good shapes from it. It costs quite a bit more than buckram, but for complicated items it would save a lot of time and therefore money.

Once I have played with this hat base a bit more....I will let you know how it goes... and pics will follow

cheers for now, have fun and enjoy the sun xx

Tuesday, 24 July 2012

Making a buckram fascinator - Part 2

Well, I started adding decoration to my hat and then suddenly realised that I hadn't photographed it as I went!

My apologies that the veiling and leaves have been sewn on with any tutorial, but this was the easiest bit. I cut some purple, pink and lilac veiling and fussed about with it until I was happy with the look. Its best to keep trying it on your head in front of a mirror, to get it just right. I then added a selection of shiney acrylic leaves in toning and contrasting colours. All of this was stitched through the top fabric, I didn't need to go right through the hat.

Next I cut a small section of blue/grey lining on the bias and tacked this to the underside of the hat.

The next stage is to tidy the edges of the lining etc by covering with tape. Normally i would use grosgrain, but I didn't have any in a suitable colour, so I have used lilac bias binding. I ironed this into a curve first, so that it would fit nicely. Just pull the bias around at an angle whilst running the iron over it.

I've realised that my ironing board cover looks very tatty, and its covered in fabric paint!

The next stage was to stitch the binding in place using very small running stitches along both sides and folding the ends together neatly. I also added my own label

That's it done and now ready for sale! I hope you enjoy reading, and I always look forward to any comments. Best wishes to you all

Thursday, 19 July 2012

Making a buckram fascinator - part 1

I hope this little tutorial will be of interest, as I am not very good as chatting about anything other than hats, vintage or the state of the British weather :)

This is a little buckram hat that I am making and these are the first stages. I cut 2 oblongs of white buckram fabric roughly 8 x 10 inches. Buckram is a stiffened cotton open weave fabric, and once wet it can be moulded and reshaped. I ran the pieces under the tap until they became soft enough to manipulate, then I stretched them over a polystyrene head. You don't need a hat block for this, as the hat will be one size, and just needs to have a curve to it. I stretched them on pulling and pinning at the same time to keep the fabric in place without folds. I always use 2 layers as I find it gives more body and a better finish. The starch in the fabric can make your hands sticky, and can cause the fabric to stick to your mould, so it is best to cover the mould /head with some cling film or tin foil first.

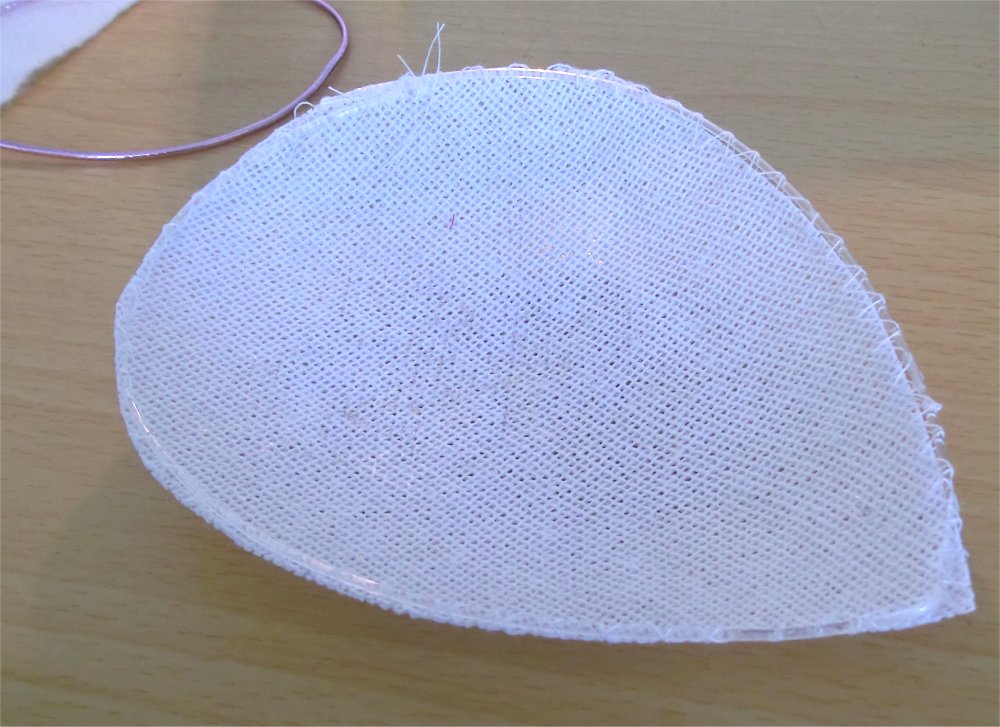
This was then left overnight to dry, it must be really dry before you remove it from the mould. Before I removed it I used a laundry pen to mark out a shape for my hat, and I decided on a small tear drop. I removed the buckram from the head and cut around my shape. The next stage was adding some wire to the edge to keep the hat firm and give a good shape. I decided to use plastic brim wire, as I don't want the hat to be bent or deformed. I stitched this in place using a zig zag stitch on the sewing machine.

I like to add hat elastic at this stage, before I cover the base, and I had some nice shiny pink elastic, so I'm using this. I poked 2 holes either side of the base using an awl or you can use a large needle. I then thread the elastic through, make a knot and then stitch using the sewing machine to make doubly sure it won't come adrift!

Normally you would use a domette or similar fabric for covering the base, this achieves a nice smooth finish to your covering. I used a similar interlining and cut this to the approximate shape of the tear drop and fold over and roughly stitched in place. Then I sew, using a machine zig zag some bias binding around the inside of the base to give me something to sew the final cover and lining to.

Then I cut my fabric to cover the base, I have used a purple linen mix fabric. Make sure you add lots of small pleats as you go around, this gives a nice neat outer edge. I stitch the outer fabric to the bias tape that I put in place previously.

Thats all for now, but I will add part 2, which is the trimming and lining etc. I hope you enjoy my tutorials

Thursday, 21 June 2012

Made my first silk flower!

I get so excited trying something new. I never know if it is going to turn out well, but I was so into this project, that I got up at 6am to finish it!

I used a pure silk furnishing fabric, which probably wasn't the best to use for a first time go, as it was quite heavy and hard to stiffen, but once started, I just had to carry on. The petals were cut out and stiffened last night using a combination of cornflour and PVA.

I have no millinery flower tools (way too expensive), so the kitchen drawers and workshop tools came in handy.....I used a melon baller, an awl and a couple of screwdrivers!

I find millinery so gripping, just can't get enough of it lately :) The hat is not quite completed but what do you think?

I just wish our weather was better so that I could take some photos that don't look like I live in a cave, but at 7am it was pretty gloomy!

Friday, 15 June 2012

Make a turban - Tutorial

I love turbans, and think they are under rated, towelling ones are great for the beach or bath, and any turban is good for a bad hair day.

Liz and Joan always make them look good!

This is just an easy peasy turban that took me about 40 minutes to make...

This style of turban works best with stretch fabric, and the pattern pieces should be cut on the bias. I have cut 3 pieces out of some funky floral stretch that has been in the fabric stash for a while.

In total I cut 3 rectangles, one 24" x 10", one 24" x 5" and one 4" x 5", This makes a large head size (23 - 24 inches) so if you want a medium size just make the 2 main pieces 23 x 9 and 23 x 4 .

The long thin band should be folded in half wrong sides together and sewn to one long edge on the largest piece. I used an overlocker, but if not, its best to use a stretch stitch.

Once the band is stitched on, fold the turban in half right sides together, and stitch around the edge forming a curve in the corner, and leaving a 3/4 inch gap at the end.

Turn the hat right side out and form 3 pleats at the back of the hat, you will need to adjust these to suit, and try it on to get the best effect. Then stitch these pleats down by 'stitching in the ditch'.

The small pattern piece that you have left should be folded right sides together and sewn to form a nice band when turned out, This band is then fed through the hole left at the front seam, the fabric gathered up and the small band ends sewn together. I also made a little bow to thread through the band, but this could be removed it needed, I didn't bother stitching it in.

you could get new looks by adding a brooch or decoration to the front.

Let me now if you make one. I think I will make some more now, as the weather here is still very dismal and rainy, so it's much more fun to stay in and sew!