This tutorial is for a lovely 50s pillbox, the pattern comes from Bramcost, who sell vintage patterns and more, the link to this pattern can be found here:
http://www.facebook.com/Bramcost.Publications
This hat should take about 90 minutes to make for the experienced seamstress.
Print out the 4 page pattern. The pattern is sized for a 22 inch head and uses ½ inch seam allowance.
TIP: When I made the hat I found that the top was too big, and I needed to make the hat band larger for my head.It states cut a half circle with your compass set to 5 inches, I found 4.75 inches to be better, if you still want a 22 inch hat. If you need the hat to be larger cut the head band pattern out half an inch longer.
The pattern instructions are quite clear and the headband is all ready to cut out and selloptape together ( don't overlap the edges or the band will be too small), you only have to measure and cut the top section (crown).
The good thing about hats, is that you don't need much fabric, so I found a nice off cut of lavender Harris Tweed that I am using for my hat. I am cutting the lining out from a pretty lilac flower print cotton.
TIP: If you are making the hat out of very heavy fabric, you don't really need any interlining, just cut your fabric and lining pieces out. But I am using lightweight fusible interfacing for this hat, as I like it quite stiff. Also be aware that if you use a thin fabric, the hat will come up larger, and will be more of a beret style.
TIP: When cutting the crown sections, make sure you mark the middle point (where your seam starts). I use a disappearing Laundry marker pen from Kuretake. It vanishes after a few hours or can be erased with water!I have also used a pin in the picture, as Lavender is the worst colour to photograph!
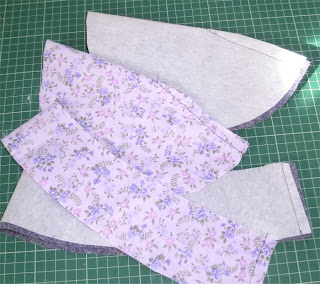
Before sewing you should have 4 pieces, 2 x crown and 2 x side band.
With right sides together, sew the seams on the back of each side band, trim and press open. Then sew the seams on the crowns (circles), again trim and press open. This will now be cone shaped.
Now pin the headband fabric to the cone, making sure you use the longer (top) edge of the head band. You will have to ease the head band fabric to fit. Sew all the way around and trim. Then do exactly the same with the lining pieces, making sure right sides are together.
Turn the lining right side out, and place inside the hat (so that both right sides are together).
Sew together all around the bottom edge leaving a gap of approximately 3 inches. Trim seam.
Pull the hat through the lining using the gap. Press all seams. You can either slip stitch the gap together, or tack and then top stitch all around the lower edge ( which I have done).
You can then add a petersham ribbon band to the inside bottom edge by hand, if required. TIP: adding a band will decrease the size again slightly.
You can now decorate the hat to suit. As I wanted a button on the top, I used an old button and cut a circle of fabric big enough to go over the button, I ran a long stitch around the edge and drew the stitches up, thereby covering the button. I then stitched firmly in place.
And now your hat is finished!! I hope the above all makes sense, but if not, do let me know :)


No comments:
Post a Comment